Introduction
Any aspiring developer celebrates a major accomplishment when their Flutter app becomes available on the Google Play Store. The culmination of endless design work and testing efforts comes to fruition when you successfully launch your app, which proves to be extremely fulfilling. The publishing process can seem daunting when you attempt it for the first time. But don’t worry—you’re not alone. This guide makes the journey straightforward and delivers a beginner-friendly roadmap from start to finish.
Launching Your Flutter App on Google Play: This complete guide utilizes real-world experience and practical knowledge to make the publishing process understandable and attainable while ensuring it remains simple.
How Play Store Publishing Boosts Student Careers
Publishing your app unlocks several opportunities. Publishing your app serves as a portfolio enhancer and adds immense value to your resume. Through this process, you receive practical real-world experience in developing applications. You have the chance to showcase your creative abilities to your social circle and job prospects. A final point is that some apps create money through advertising and in-app purchases. That’s why Launching Your Flutter App on Google Play: Every student developer needs Launching Your Flutter App on Google Play: A Complete Guide.

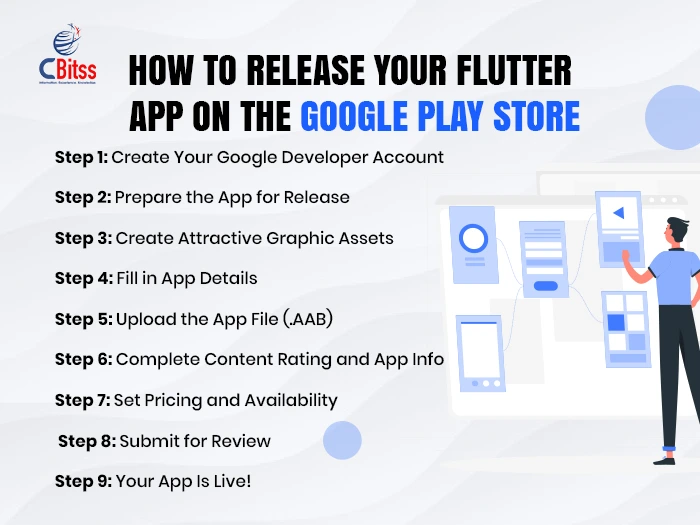
Step 1: Create Your Google Developer Account
To begin, visit the Google Play Console. Next, sign in with your Google account. Proceed with the payment of the one-time registration fee, which costs approx. $25 or about ₹2000 INR. Fill in your developer profile using precise information following this step.
Select an email account you will maintain permanently because it needs to be connected to all your applications.
Step 2: Prepare the App for Release
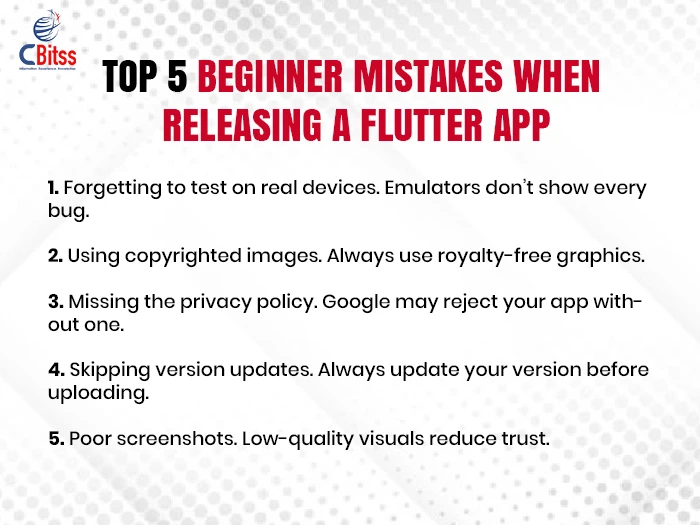
Before uploading, finalize your app. Before uploading your app to the Google Play Console, you must verify that it runs without issues on actual devices. Then, pick a unique app name. Make sure to create a high-definition app icon with 512×512 pixels resolution along with setting a version number, such as 1.0.0.
During development, I performed multiple app tests with classmates and friends to verify the absence of bugs. The practice of extensive testing prevented many problems during later stages.
Step 3: Create Attractive Graphic Assets
The next step requires you to make your application unique. First, design a feature graphic (1024×500 pixels). Capture screenshots from your phone at 1080×1920 pixels to display app usage. I created my app visuals using Canva because it offers a free and easy-to-use platform for beginners.
Step 4: Fill in App Details
Go to the Play Console to input your application details:
App Name: Keep it short and catchy.
Short Description: One-liner about the app.
Full Description: Describe your app’s function and demonstrate its usefulness for the intended audience.
Category: Choose the correct category, such as education or productivity.
Contact Email: Add your support email.
Privacy Policy URL: Required if you collect user data.
You can publish your privacy policy free of charge by using Notion or GitHub Pages if you lack a website.
Step 5: Upload the App File (.AAB)
The upload process for Flutter apps needs to use the.AAB file format. You can create it with Android Studio or command line tools. To upload your .AAB file, you need to navigate to “Production” in the Play Console, then create a release. Don’t forget to write simple release notes.
Step 6: Complete Content Rating and App Info
Next, complete several forms:
Content Rating Questionnaire: For age-based classification.
Target Audience: Choose your user’s age group.
Data Safety: Declare what data your app collects.
App Access: If login is required, provide test credentials.
I managed to answer this section correctly by studying Google’s tooltips because it felt tricky at first. Take your time—accuracy is key.
Step 7: Set Pricing and Availability
Determine if your application should be free or require payment. Most student apps start as free. Identify the countries that will have access to your app.
Note: After you set your app as free, you cannot later change it to require payment.
Step 8: Submit for Review
You’ve come a long way. Press “Publish” to initiate Google’s review process for your app submission. The review process for submitting your app takes between one and seven days. Maintain your patience and check your email regularly to receive updates.
Step 9: Your App Is Live!
Following approval, your application becomes available to users through the Play Store. I distributed my app to my family and friends while also listing it on my professional resume. That moment made all the effort worthwhile.
Launching Your Flutter App on Google Play: The Complete Guide has reached its final destination because your app has launched and awaits user interaction!
How Launching an App Gives You an Edge in Placements
Employers value candidates who demonstrate abilities beyond academic knowledge during interviews and internships. The launch of an app demonstrates your ability to take the initiative while showcasing your creative talents and determination. This experience provides authentic stories for your placement interviews and helps you differentiate yourself from other candidates.

Author Bio
Written by: As a senior Computer Engineering student from Chandigarh, I am studying mobile app development at CBitss Technologies. The Google Play Store hosts three of my Flutter applications, and I take pleasure in assisting other students with their technological advancement.
Final Thoughts
The process of launching your Flutter application on the Google Play Store provides developers with a valuable experience that enriches their professional growth. Each phase, from creating your developer account to submitting your app for review moves you further toward sharing your work with the world. This guide helps you streamline your process while avoiding typical errors and guarantees your app’s readiness for users. Build new skills and develop new applications because your next brilliant concept may exist in just one app’s development.


